Introduction
You can use a Dutch oven as a slow cooker by cooking food in a tightly covered pot at low heat. Use a stovetop burner for gentle simmering or place the Dutch oven in a low oven, usually between 250°F and 300°F. The heavy pot holds heat well and helps tenderize meat, beans, and vegetables over time.
This method works well in a U.S. kitchen when you do not have a slow cooker, need more browning, or want to move a meal from the stovetop to the oven. It does require more checking than an electric slow cooker because the heat is not controlled by a thermostat.
Can a Dutch Oven Replace a Slow Cooker?
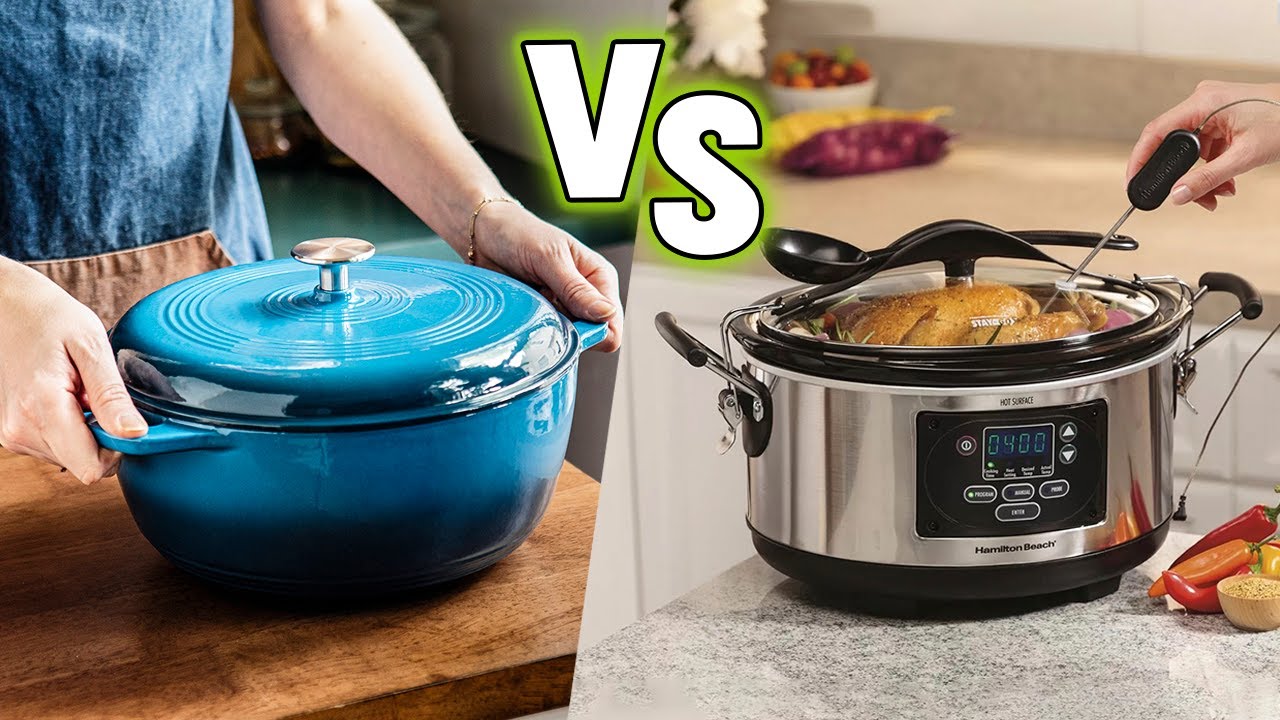
A Dutch oven can replace a slow cooker for many braises, stews, soups, chili recipes, and pot roasts. The main difference is how heat reaches the food.
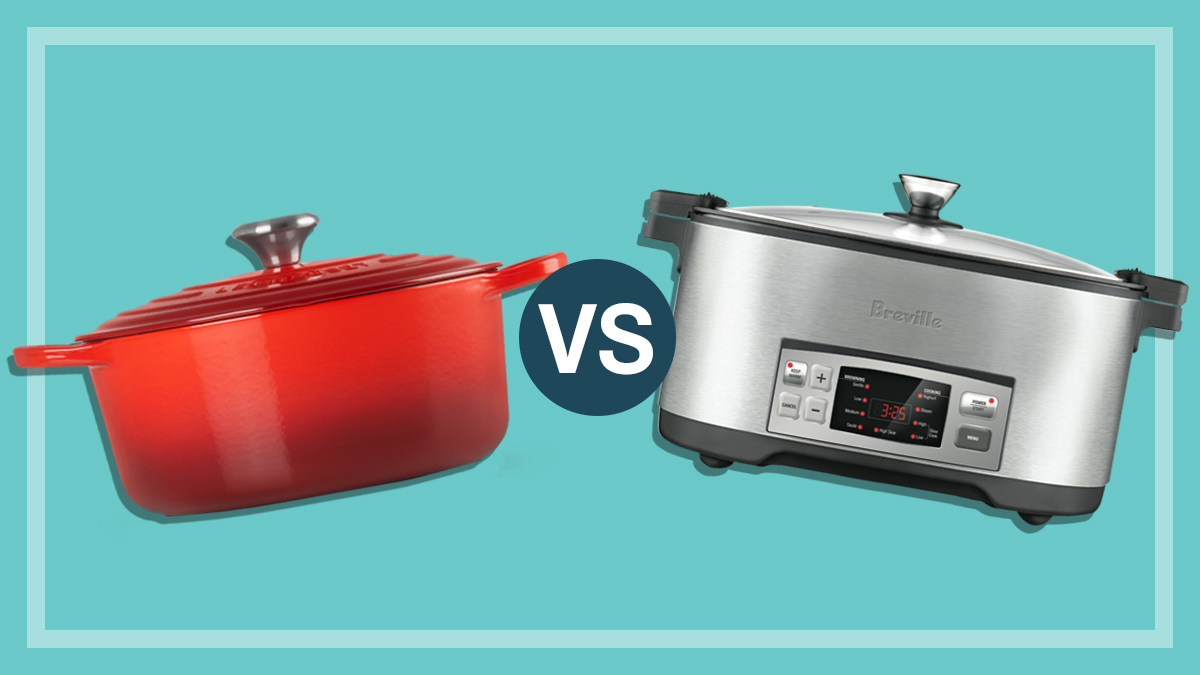
An electric slow cooker heats the crock from the sides and manages the temperature over many hours. A Dutch oven heats from the bottom or from the oven around the pot. This often cooks food faster, so you may need to shorten the cooking time.
A Dutch oven also allows you to:
- Brown meat in the same pot.
- Reduce liquid more easily.
- Cook on the stovetop or in the oven.
- Use high heat for a short time when needed.
- Build a deeper sauce through browning.
The trade-off is that you must watch the heat and liquid level. A slow cooker is more forgiving during a long, unattended cook.
What type of Dutch oven works best?
A heavy, enameled cast-iron Dutch oven works well for most kitchens. Bare cast iron also works, but acidic foods such as tomatoes can affect the seasoning during long cooking.
Choose a pot that:
- Holds all ingredients without being packed full.
- Has a tight-fitting lid.
- Can safely go into your oven at the planned temperature.
- Has handles that tolerate oven heat.
- Is large enough to leave some space above the food.
Check the maker’s instructions before using the lid in the oven. Some lids have knobs that are not rated for high heat.
A Dutch oven should not be placed directly on a heating element unless it is designed for that use. Most cast-iron models work on gas, electric, and induction stovetops, but the manufacturer’s instructions take priority.
The Best Oven Temperature for a Dutch Oven Slow Cooker
Set the oven between 250°F and 300°F for most Dutch oven slow-cooking recipes. Use the lower end for long, gentle cooking and the higher end when you need the meal to finish sooner.
A practical starting point is:
| Cooking method | Starting temperature | Typical use |
|---|---|---|
| Very low oven braise | 225°F–250°F | Tough meat and long cooking |
| Standard Dutch oven slow cook | 275°F–300°F | Stews, chili, pot roast |
| Gentle stovetop simmer | Low heat | Soups and dishes needing frequent checks |
These temperatures are not exact equivalents to a slow cooker’s “Low” setting. Slow cookers vary by brand, size, recipe, and food load. A Dutch oven also transfers heat more directly, so food may cook faster.
Do not use an oven temperature so low that the food never reaches a safe cooking temperature. For meat and poultry, use a food thermometer and follow the USDA Food Safety and Inspection Service guidance.
Should you use 200°F?
You can use 200°F for some long braises, but it may take more time for the food to heat through. The pot, ingredients, starting temperature, and oven accuracy all affect the result.
For a first attempt, 275°F is easier to manage. Once you know how your oven and pot behave, you can adjust the temperature and cooking time.

How to Use a Dutch Oven as a Slow Cooker in the Oven
Use the oven method when you want steady heat with less stirring. It is usually the closest Dutch oven method to slow cooking.
1. Choose a suitable recipe
Select a recipe with moist heat. Good choices include:
- Beef chuck roast.
- Pork shoulder.
- Chicken thighs.
- Short ribs.
- Lentil soup.
- Bean chili.
- Vegetable stew.
- Braised cabbage.
Avoid recipes that depend on quick cooking or a dry cooking environment. A Dutch oven does not work like a slow cooker for every dish.
2. Brown the meat first
Heat the Dutch oven over medium-high heat. Add a small amount of cooking oil, then brown the meat in batches.
Do not crowd the pot. Crowding traps steam and prevents browning. Brown each side, then transfer the meat to a plate.
This step is optional, but it adds flavor. It also gives you a chance to soften onions, carrots, celery, or other vegetables in the same pot.
3. Add aromatics and liquid
Cook onions, garlic, or other aromatics briefly. Scrape up the browned bits from the bottom with a wooden spoon.
Add the cooking liquid, such as:
- Low-sodium broth.
- Water.
- Crushed tomatoes.
- Wine used as part of the recipe.
- Beer or cider.
- A mixture of broth and sauce.
A Dutch oven does not lose as much liquid as an uncovered pot, but it may lose more moisture than a slow cooker. Start with enough liquid to keep the food moist without submerging every ingredient.
For a braise, liquid often reaches about one-half to two-thirds of the way up the meat. For soup, use enough liquid to cover the ingredients as the recipe requires.
4. Bring the liquid to a gentle simmer
Place the lid on the Dutch oven and bring the liquid to a gentle simmer on the stovetop. This helps the food start heating before it enters the oven.
Do not let the liquid boil hard. A rolling boil can make meat tough and cause delicate vegetables to break apart.
5. Cover the pot tightly
Place the lid on the pot before moving it to the oven. A tight lid keeps steam inside and protects the food from drying out.
If the lid does not seal well, you can place a sheet of oven-safe parchment under the lid. Do not use plastic wrap or any material that is not rated for oven use.
6. Cook at 275°F to 300°F
Place the covered Dutch oven in the oven. Start checking the food after about two-thirds of the estimated cooking time.
Many Dutch oven meals finish in:
- 2½ to 4 hours for a medium pot roast.
- 3 to 5 hours for larger cuts of beef or pork.
- 1½ to 3 hours for chicken thighs.
- 1½ to 3 hours for vegetable stews.
- 2 to 4 hours for many bean or chili recipes.
These are starting ranges, not guarantees. Food is ready when it is tender and reaches a safe internal temperature.
7. Check for doneness
Use a fork or thermometer to check the food. Tough meat is ready when a fork slides in with little resistance. Poultry should reach at least 165°F. Ground meat should reach at least 160°F. Whole cuts of beef, pork, veal, and lamb should reach at least 145°F, followed by a three-minute rest, according to the USDA.
8. Adjust the sauce at the end
If the stew is too thin, remove the lid and simmer it on the stovetop. If it is too thick, add warm broth or water a little at a time.
Taste before adding salt. Long cooking can concentrate the flavor as liquid evaporates.

How to Use a Dutch Oven as a Slow Cooker on the Stovetop
The stovetop method works, but it needs closer attention. The bottom of the pot receives direct heat, so food can scorch if the burner is too high.
Follow these steps:
- Brown the meat and vegetables.
- Add the liquid and return the food to a gentle simmer.
- Reduce the burner to the lowest setting that maintains a few small bubbles.
- Cover the pot.
- Check the food every 30 to 45 minutes.
- Stir food that may stick, such as chili, beans, or thick sauces.
- Add hot liquid if the pot becomes dry.
- Move the pot off the burner when the food is tender.
A flame diffuser can help spread heat on a gas stove. On an electric stove, the burner may stay hot after you lower the setting, so adjust early.
Do not leave a stovetop Dutch oven unattended for many hours. The bottom can burn while the top still looks moist.

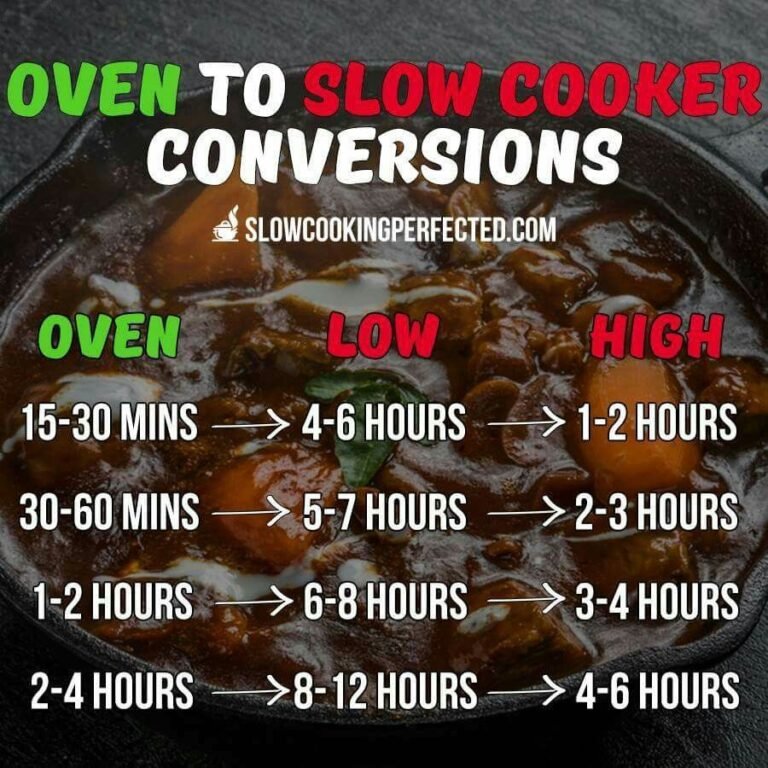
How to Convert a Slow Cooker Recipe to a Dutch Oven
Most slow cooker recipes need three changes: a higher cooking temperature, a shorter cooking time, and slightly less liquid.
Use a simple time guide
The following chart gives a reasonable starting point for oven conversion:
| Slow cooker setting | Slow cooker time | Dutch oven starting point |
|---|---|---|
| Low | 8 hours | About 3 to 4 hours at 275°F–300°F |
| Low | 6 hours | About 2½ to 3½ hours at 275°F–300°F |
| High | 4 hours | About 2 to 3 hours at 300°F |
This is a planning guide, not a fixed formula. A large roast may take longer. Small pieces of meat and cut vegetables may finish sooner.
Begin checking early. You can cook food longer, but you cannot reverse overcooking.
Reduce the liquid carefully
Slow cookers hold in much of their moisture. A Dutch oven also holds steam, but its lid may not seal as tightly, and the oven may reduce liquid more quickly.
If a converted recipe contains a large amount of broth, start with slightly less. Keep enough liquid to prevent scorching and to create steam.
Do not reduce liquid too much in recipes with dried beans, grains, or pasta. These foods need moisture to cook.
Add some ingredients later
Slow cookers often allow all ingredients to cook together. In a Dutch oven, delicate foods may become soft before the main ingredient is ready.
Add these items later when needed:
- Potatoes cut into small pieces.
- Green beans.
- Peas.
- Pasta.
- Fresh herbs.
- Dairy products.
- Seafood.
Add dairy near the end to reduce curdling. Add pasta only when enough cooking time remains for it to become tender.
Dutch Oven Slow Cooker Cooking Times by Food
Cooking time depends on the cut, size, starting temperature, and amount of food in the pot. Use tenderness and internal temperature as the final tests.
| Food | Oven setting | Approximate time | Doneness check |
|---|---|---|---|
| Beef chuck roast | 275°F–300°F | 3–5 hours | Fork-tender; safe internal temperature |
| Pork shoulder | 275°F–300°F | 3–5 hours | Tender enough to pull apart |
| Chicken thighs | 275°F–300°F | 1½–3 hours | At least 165°F |
| Short ribs | 275°F–300°F | 3–5 hours | Meat pulls away from bone |
| Lentils | 275°F–300°F | 1½–2½ hours | Tender but not split |
| Dried beans | 275°F–300°F | 2–4 hours or longer | Fully tender throughout |
| Vegetable stew | 275°F–300°F | 1½–3 hours | Vegetables are tender |
Do not rely on the clock alone. A thick roast can remain tough after the stated time, while small pieces may become dry much sooner.
Dried beans need special care
Some dried beans contain naturally occurring toxins that are reduced by proper cooking. The U.S. Food and Drug Administration advises boiling certain dried beans, especially red kidney beans, before slow cooking.
For safety, boil dried kidney beans vigorously for at least 10 minutes before using them in a long, low-temperature recipe. Do not assume a low oven or slow simmer will provide the same protection.

How Much Liquid Should You Add?
Use enough liquid to create a moist cooking environment, but not so much that the food turns watery. A covered Dutch oven usually needs less liquid than an uncovered braising pan.
Use these practical rules:
- For a pot roast, let liquid reach about halfway up the meat.
- For stew, use liquid near the level of the solid ingredients.
- For soup, add enough liquid to cover the ingredients.
- For grains and beans, follow the recipe’s absorption needs.
- For chili, begin with less liquid and add more if needed.
- For tomato-based dishes, count crushed tomatoes as part of the liquid.
Keep the lid closed as much as possible. Every time you lift it, steam escapes and cooking slows.
If the pot is dry during cooking, add hot broth or water. Cold liquid can lower the temperature and may stress some enameled cookware.

Common Mistakes and How to Fix Them
The food is still tough
Tough meat often needs more time, not more heat. Keep the pot covered and continue cooking until the connective tissue softens.
If the liquid is boiling hard, lower the oven temperature. Excessive heat can tighten meat fibers and reduce the sauce too quickly.
The stew is watery
Remove the lid and simmer the liquid on the stovetop. You can also use a small amount of cornstarch mixed with cold water, then simmer until thickened.
Do not add dry flour straight to hot liquid. It can form lumps.
The bottom is burned
Burning usually means the burner is too high, the sauce is too thick, or the pot lacks liquid. Move the food to a clean pot without scraping up the burned layer.
For the next batch, use the oven method or lower the stovetop heat. Stir thick foods more often.
The vegetables are mushy
Cut firm vegetables into larger pieces or add them later. Potatoes and carrots can handle long cooking better than peas, green beans, and zucchini.
The meat is dry
Dry meat may be too lean, cut too small, cooked too long, or exposed to too much heat. Use cuts with connective tissue for braises, keep the lid closed, and avoid a hard boil.
The food tastes flat
Browning may be missing, or the dish may need salt and acid. Taste after cooking, then adjust with salt, lemon juice, vinegar, tomato, or fresh herbs as appropriate.
Add strong seasonings in stages. Long cooking can soften some flavors but intensify others.

Dutch Oven Safety Tips
Use oven mitts every time you touch the pot or lid. Cast iron stays hot for a long time, and the handles may remain hot even after the pot leaves the oven.
Follow these safety rules:
- Use a food thermometer for meat and poultry.
- Do not use a “keep warm” setting to cook raw food.
- Refrigerate leftovers within two hours, or within one hour if the room is above 90°F.
- Divide large amounts of food into shallow containers so they cool faster.
- Do not leave a stovetop pot unattended for long periods.
- Check that the lid knob and pot handles are oven-safe.
- Let hot enameled cookware cool before exposing it to cold water.
- Never place a hot Dutch oven on a cold, wet, or delicate surface.
The USDA identifies 40°F to 140°F as the danger zone where bacteria can grow quickly. Keep food hot during service, cool leftovers promptly, and reheat leftovers thoroughly.
Key Takeaways
- A Dutch oven can replace a slow cooker for stews, braises, chili, beans, and pot roasts.
- Use a covered oven at about 275°F to 300°F as a practical starting point.
- Expect many dishes to finish faster than they would in an electric slow cooker.
- Brown meat first when you want more flavor.
- Use less liquid than an uncovered recipe, but enough to prevent drying or scorching.
- Check food early and use tenderness plus internal temperature to judge doneness.
- Use extra care with dried kidney beans and raw meat.
Frequently Asked Questions
Can I put a Dutch oven in the oven overnight?
You can cook a suitable recipe overnight only if the cookware, lid, oven, recipe, and food quantity support it. Use a low but effective temperature, keep the pot covered, and avoid recipes that may dry out or scorch. For food safety, do not use an oven setting so low that the food stays in the danger zone for a long time.
Is a Dutch oven better than a slow cooker?
Neither is always better. A Dutch oven is better for browning, reducing sauces, and moving between the stovetop and oven. An electric slow cooker is better for long, unattended cooking with steady heat.
Can I use a Dutch oven on a gas or electric stove?
Most cast-iron Dutch ovens can be used on gas and electric stoves. Some also work on induction. Check the manufacturer’s instructions, lift the pot instead of sliding it on a glass cooktop, and use low heat because cast iron holds heat well.
Should the meat be fully covered with liquid?
No. For most braises, the liquid should reach partway up the meat rather than cover it completely. Steam and the covered environment help cook the exposed portion.
Can I use a Dutch oven for a slow cooker chicken recipe?
Yes. Chicken thighs usually handle Dutch oven cooking better than lean chicken breast because they stay moist longer. Cook poultry to at least 165°F and check it before the estimated finish time.
Can I leave the Dutch oven on the stovetop while I sleep?
That is not a good practice. A stovetop pot can lose liquid, scorch, or create a fire risk if the burner or cookware has a problem. Use a properly managed oven method instead, and follow the cookware and appliance instructions.
Conclusion
To use a Dutch oven as a slow cooker, brown the ingredients, add enough liquid, cover the pot, and cook it gently at about 275°F to 300°F. Check the food earlier than the original slow cooker recipe suggests, since a Dutch oven often cooks more quickly.
The best results come from low heat, a tight lid, suitable cuts of meat, and regular checks for moisture and doneness. Start with a covered oven braise, then adjust the time and liquid after you learn how your pot and oven behave.