You can convert most slow cooker recipes to an Instant Pot by reducing the cook time, adding enough thin liquid for pressure, and choosing the right release method. Let’s see how to convert slow cooker recipe to instant pot.
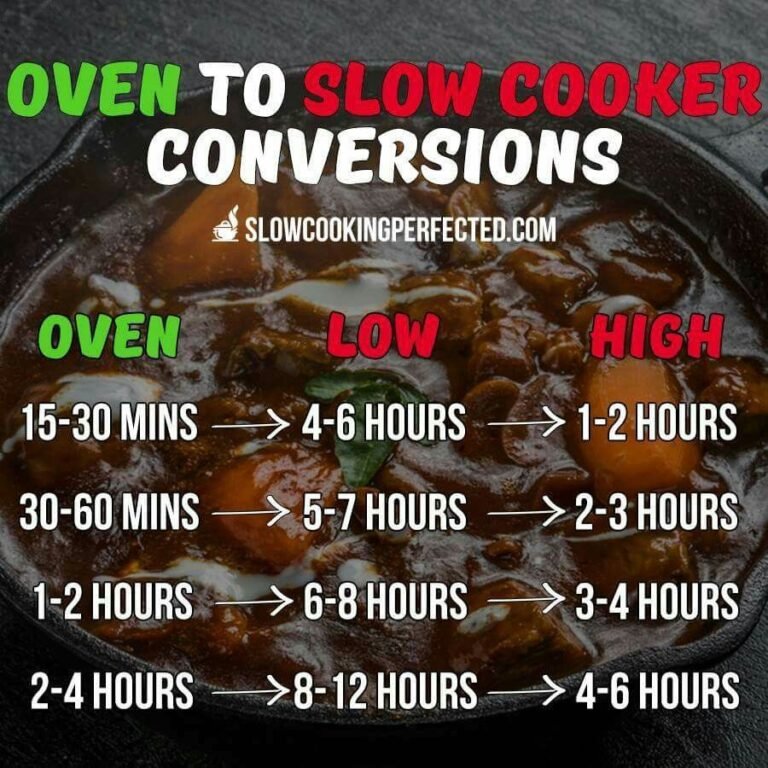
As a starting point, slow cooker recipes often need about one-quarter to one-third of the cooking time in an Instant Pot on high pressure. This is only a guide. Meat size, frozen ingredients, beans, vegetables, and the recipe’s liquid all change the result.
For a typical U.S. kitchen, use the recipe’s LOW or HIGH setting as a clue, not as a direct time match. A slow cooker cooks gently for hours. An Instant Pot cooks under pressure, so it uses shorter times but needs more exact liquid and release instructions.

The basic slow cooker to Instant Pot conversion
Start with the table below, then adjust it for the food in your recipe.
| Slow cooker recipe | Instant Pot starting point |
|---|---|
| 4 hours on HIGH | 15–20 minutes on high pressure |
| 6 hours on HIGH | 20–25 minutes on high pressure |
| 8 hours on LOW | 25–35 minutes on high pressure |
| 10 hours on LOW | 35–45 minutes on high pressure |
| Tough beef roast | 45–60 minutes, depending on size |
| Dried beans | 25–45 minutes, depending on type and soaking |
| Boneless chicken breasts | 8–12 minutes |
| Chicken thighs | 10–15 minutes |
| Pork shoulder for shredding | 45–60 minutes |
These times are for pressure-cooking time only. The Instant Pot also needs time to build pressure. That may add 10 to 25 minutes, depending on the amount and temperature of the food.
The most reliable method is to start with a modest time. You can always pressure-cook the food for a few more minutes. You cannot easily undo meat or vegetables that have become too soft.

What changes when you use an Instant Pot?
A slow cooker and an Instant Pot use heat in different ways.
A slow cooker cooks food at a low temperature over several hours. Its lid is not sealed tightly, so some liquid can escape as steam. Most slow cooker recipes therefore need only a small amount of broth, sauce, or water.
An Instant Pot traps steam inside a sealed pot. The pressure raises the boiling point of water and cooks food much faster. Since steam cannot escape in the same way, you usually need less total liquid than the original slow cooker recipe, but you still need enough thin liquid to create steam.
The key differences are:
- Cooking time: Much shorter in an Instant Pot.
- Liquid: The Instant Pot needs thin liquid for pressure.
- Evaporation: There is little evaporation during pressure cooking.
- Browning: You can brown meat first with the Sauté function.
- Thick sauces: Thick sauces can cause a burn warning.
- Release method: Natural release and quick release affect texture.
The Instant Pot model matters, too. Read the manual for your specific U.S. model before cooking. Minimum liquid requirements, maximum fill lines, and settings can vary.

Step 1: Separate the recipe into ingredients and cooking stages
Do not transfer every slow cooker instruction word for word. First, divide the recipe into parts.
Look for:
- Ingredients that need browning.
- Ingredients that need the longest cooking time.
- Ingredients that cook quickly.
- Ingredients added at the end.
- Sauces or thickeners.
- Dairy products.
- Fresh herbs or toppings.
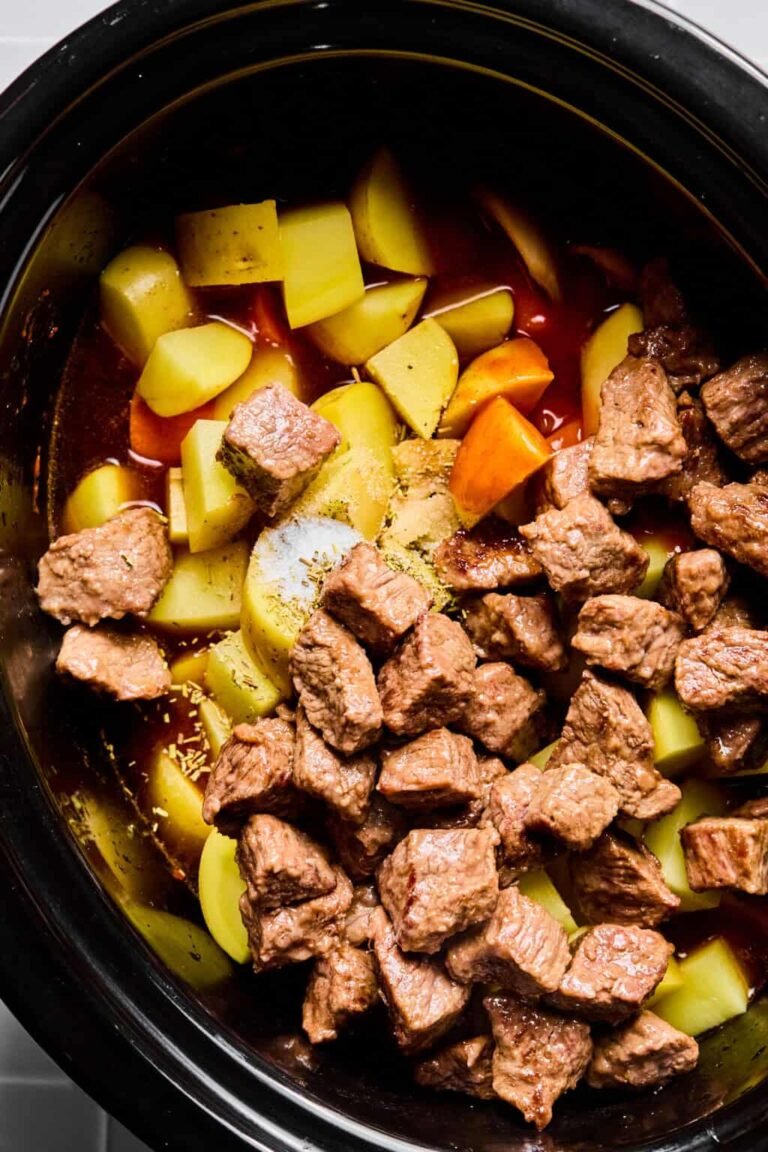
For example, a slow cooker beef stew may list beef, onions, carrots, potatoes, broth, tomato paste, and flour. In the Instant Pot, you would usually:
- Brown the beef in batches.
- Sauté the onions.
- Add thin liquid and scrape the pot.
- Pressure-cook the beef.
- Add quick-cooking vegetables later, if needed.
- Thicken the broth after pressure cooking.
This approach prevents soft vegetables, scorched sauce, and unevenly cooked meat.
Brown meat first when flavor matters
Browning is optional, but it adds a deeper roasted flavor. Use the Instant Pot’s Sauté setting with a small amount of oil.
Brown meat in batches. Crowding the pot can make the meat steam instead of brown. After browning, add broth or water and scrape up any stuck bits. Those browned bits add flavor, but they can also trigger a burn warning if they remain stuck to the bottom.
Add quick-cooking foods later
Potatoes, carrots, peas, seafood, pasta, and delicate vegetables may not need the full pressure-cooking time.
You can:
- Cut firm vegetables into large pieces.
- Place them on top of the meat.
- Add them after the main cooking cycle.
- Use a short second pressure cycle.
- Stir in frozen peas, spinach, or cooked pasta at the end.
Pressure cooking continues during the release stage, especially with a natural release. Plan for that extra heat.

Step 2: Adjust the liquid for pressure cooking
Use enough thin liquid to build pressure, but do not blindly add the full amount from the slow cooker recipe.
Good pressure-cooking liquids include:
- Water
- Beef, chicken, or vegetable broth
- Thin tomato sauce
- Wine mixed with another liquid
- Coconut milk, if the recipe and model allow it
- Thin barbecue sauce mixed with broth or water
Thick foods do not create steam well. Examples include tomato paste, heavy cream, flour-thickened gravy, canned condensed soup, and very thick barbecue sauce.
Place thin liquid in the pot first. Add thick ingredients on top when possible. Do not stir thick sauce into the bottom before pressure cooking unless the recipe has been designed for that method.
How much liquid should you use?
Follow the minimum liquid requirement in your Instant Pot manual. Many electric pressure cookers need at least about 1 to 1½ cups of thin liquid, but the exact amount depends on the model, size, food, and cooking time.
A practical approach is:
- Keep enough liquid to cover the pot’s required minimum.
- Use broth or water to thin concentrated sauces.
- Do not add extra liquid just because the slow cooker recipe contains a large amount.
- Remember that the Instant Pot loses little liquid during pressure cooking.
For a soup, stew, or braise, the liquid may remain close to the original volume. For a thick slow cooker sauce, replace part of the sauce with broth or water, then thicken it after cooking.
Alcohol needs care
Alcohol does not always cook away fully in a sealed pressure cooker. If using wine or beer, use a modest amount and combine it with another thin liquid. Never rely on pressure cooking to remove all alcohol.

Step 3: Choose the correct pressure time
Set the time based on the main ingredient, its size, and the texture you want.
Meat conversion guide
| Ingredient | Instant Pot starting time | Release |
|---|---|---|
| Boneless chicken breast | 8–12 minutes | 5-minute natural release, then vent |
| Bone-in chicken thighs | 10–15 minutes | Natural or partial natural release |
| Beef stew cubes | 25–35 minutes | 10–15-minute natural release |
| Beef chuck roast | 45–60 minutes | Full natural release |
| Pork shoulder chunks | 45–60 minutes | Full or long natural release |
| Pork loin | 20–30 minutes, depending on size | 10-minute natural release |
| Turkey breast | Time varies by size | Check internal temperature |
These are starting points, not guarantees. The meat’s thickness matters more than its total weight. A thick roast may need more time than several small pieces with the same total weight.
For food safety, check meat with a food thermometer. The U.S. Department of Agriculture recommends 165°F for poultry. USDA guidance lists 145°F with a three-minute rest for whole cuts of beef, pork, lamb, and veal. Ground meats require a higher internal temperature. Use current USDA guidance for the exact food you are preparing.
Why natural release often works best for meat
A natural release lets pressure fall gradually. This helps meat retain moisture and reduces the chance of tough fibers caused by a sudden pressure change.
Use natural release for:
- Large roasts
- Pork shoulder
- Beef stew
- Beans
- Soups with a lot of liquid
- Foods that may foam
A quick release can work for some vegetables and small pieces of chicken, but it may make meat drier or cause hot liquid to spray through the valve.
Step 4: Add ingredients in the right order
Layering matters in an Instant Pot.
A useful order is:
- Add thin liquid.
- Scrape the bottom clean.
- Add meat.
- Add firm vegetables.
- Add thick sauces on top.
- Keep dairy, flour, cornstarch, and delicate foods for the end.
Do not fill the pot past the maximum line. For foods that expand or foam, such as beans, grains, and some soups, follow the manual’s special fill limit. These foods may need more empty space than a normal stew.
When to add dairy
Milk, cream, cheese, and sour cream can curdle or scorch under pressure. Add them after pressure cooking.
To finish a creamy recipe:
- Pressure-cook the meat and vegetables in broth or another thin liquid.
- Release pressure safely.
- Turn on Sauté if the recipe needs gentle simmering.
- Stir in dairy at the end.
- Avoid boiling the dairy mixture hard.
For cream cheese or sour cream, temper it by mixing a little hot broth into the dairy first. Then stir it into the pot.
When to add pasta and rice
Pasta and rice absorb liquid and can become soft quickly. They also increase the risk of scorching when combined with thick sauces.
If converting a slow cooker recipe with pasta:
- Add pasta after the meat is cooked, then simmer it using Sauté.
- Or use a tested Instant Pot pasta method with the correct liquid ratio.
- Do not assume the slow cooker’s liquid amount will work under pressure.
Rice requires its own water ratio and cooking time. White rice, brown rice, wild rice, and converted rice do not cook alike.

A worked example: converting beef stew
Suppose a U.S. slow cooker recipe calls for:
- 2 pounds of beef chuck in 2-inch cubes
- 1½ cups beef broth
- 1 cup red wine
- Carrots and potatoes
- Onion and garlic
- Tomato paste
- 8 hours on LOW
A reasonable Instant Pot method would be:
- Select Sauté and brown the beef in batches.
- Remove the beef.
- Sauté the onion.
- Add broth and wine.
- Scrape the bottom until no browned bits remain.
- Add the beef and seasonings.
- Place carrots and potatoes on top if they are cut into large pieces.
- Add tomato paste on top rather than pressing it into the base.
- Cook on high pressure for about 25 to 30 minutes.
- Allow a 10- to 15-minute natural release.
- Check that the beef is tender.
- Thicken the liquid after cooking if needed.
If the beef is still chewy, seal the lid again and cook for another 5 to 10 minutes. Tough beef often needs more time, not less. If the vegetables are too soft, cook the meat alone next time and add the vegetables during a short second cycle.

How to convert slow cooker recipes for chicken, pork, beans, and vegetables
Different foods need different adjustments. There is no single conversion number that works for every recipe.
Chicken
Boneless chicken breasts cook quickly and can become dry. Use enough broth to create pressure, but avoid a long cooking time. A short natural release can help the meat stay moist.
Chicken thighs are more forgiving. They usually tolerate a longer pressure cycle and work well in soups, curries, and shredded chicken recipes.
For frozen chicken, separate the pieces if possible and allow extra time for the pot to reach pressure. Check the thickest piece with a thermometer before serving.
Pork
Pork shoulder and pork butt need time for connective tissue to soften. Cut a large roast into two or three large pieces for more even cooking.
Pork loin is leaner and needs less time. Do not use pork shoulder timing for pork loin. The longer time may produce dry, crumbly meat.
Beans
Dried beans expand and may foam. Never fill the cooker beyond the limit stated in the manual.
Soaking can reduce cooking time, but it is not always required. Cooking time varies by bean age, type, soaking method, and altitude. Older beans may remain firm after the expected time.
Do not pressure-cook kidney beans from raw without following a safe, tested method. Raw kidney beans contain phytohaemagglutinin, a toxin reduced by proper boiling. Use a method from a trusted food-safety source or boil the beans as directed before pressure cooking.
Vegetables
Dense vegetables such as potatoes, beets, and winter squash need more time than green beans or zucchini. Cut dense vegetables into similar pieces so they cook evenly.
If the original recipe cooks vegetables for eight hours with meat, that does not mean they need the same full pressure time. Large pieces may work, but small pieces can turn mushy.

What to do when the conversion does not work
Most problems have a clear cause. Make one change at a time the next time you cook the recipe.
| Problem | Likely cause | Fix |
|---|---|---|
| Burn warning | Thick sauce, stuck food, or too little thin liquid | Deglaze, add thin liquid, and layer thick sauce on top |
| Tough meat | Too little time or an unsuitable cut | Cook 5–10 minutes longer and use a natural release |
| Dry chicken | Too much time or a lean cut | Reduce time and check temperature sooner |
| Mushy vegetables | Pieces are too small or cooked too long | Use larger pieces or add them later |
| Watery sauce | Little evaporation under pressure | Thicken after cooking with Sauté |
| Curdled dairy | Dairy was pressure-cooked | Add dairy after pressure cooking |
| Foamy liquid | Beans, pasta, or starchy foods | Do not overfill; use the correct release method |
| Food is undercooked | Pieces are large or crowded | Continue cooking in short cycles |
If the Instant Pot shows a burn warning, cancel the program and release pressure according to the manual. Do not keep heating a pot with scorched food on the bottom. Once pressure is released, inspect the base, transfer unburned food if needed, clean the inner pot, and restart with enough thin liquid.

Instant Pot conversion mistakes to avoid
Avoid these common errors when changing a slow cooker recipe.
Using the same cooking time
Eight hours on LOW does not mean eight hours in the Instant Pot. Start with the ingredient-based times above and adjust after checking the result.
Ignoring pressure-build time
A 30-minute pressure cycle may take 45 to 60 minutes from start to finish. Frozen food, a full pot, and cold liquid all increase the time needed to reach pressure.
Adding flour at the beginning
Flour can settle on the bottom and cause scorching. Pressure-cook first, then make a slurry with cold water and flour or cornstarch. Stir it in after cooking.
Filling the pot too high
Overfilling can block the steam release path. Follow the maximum fill line and the lower limit for foods that expand or foam.
Forcing a quick release
Hot liquid can spray from the valve, especially with soup, beans, and starchy foods. Use natural release when the recipe calls for it, and keep your hands and face away from the steam.
Treating every Instant Pot model as identical
Models differ in size, controls, and instructions. Use the manual for your specific cooker, especially for minimum liquid, fill limits, pressure settings, and release procedures.

Can you convert every slow cooker recipe?
No. Some recipes need a new method rather than a simple time conversion.
A slow cooker recipe may not convert well if it depends on:
- Long uncovered reduction
- A crisp crust
- Evaporation
- A very thick sauce
- Delicate seafood
- Fresh dairy cooked for hours
- A baked texture
- A large piece of food that does not fit safely
- A specific slow simmer
For these recipes, use the Instant Pot for the parts it handles well. Cook the meat under pressure, then reduce the sauce with the lid off. Add fresh herbs, cream, cheese, or crisp toppings at the end.
The best conversion preserves the recipe’s goal, not every original step.

Key takeaways
- Use about one-quarter to one-third of the slow cooker time as an initial pressure-cooking estimate.
- Choose time based on the main ingredient, size, and desired texture.
- Use enough thin liquid to meet your Instant Pot manual’s requirement.
- Keep thick sauces, flour, cornstarch, and dairy out of the bottom during pressure cooking.
- Use natural release for large cuts of meat, beans, and foamy foods.
- Add delicate vegetables and dairy after the main cooking cycle when needed.
- Check meat with a food thermometer.
- If food is undercooked, use a short second pressure cycle.
FAQs About How To Convert Slow Cooker Recipe To Instant Pot
Is there a direct slow cooker to Instant Pot conversion chart?
There is no universal chart that works for every recipe. A useful starting point is 4 hours on HIGH equals about 15 to 20 minutes at high pressure, while 8 hours on LOW often equals about 25 to 35 minutes. Meat size, liquid, and release time can change the result.
Do I need to reduce the liquid in a slow cooker recipe?
Usually, yes, if the original recipe contains a large amount of broth or sauce. The Instant Pot has little evaporation. However, you must still meet the minimum thin-liquid requirement for your model.
Should I use natural release or quick release?
Use natural release for roasts, beef stew, pork shoulder, beans, soups, and foods that may foam. Quick release may suit some vegetables and small pieces of meat, but it can affect texture and may cause hot liquid to spray.
Can I put frozen meat in the Instant Pot?
You can pressure-cook some frozen meats, but the pieces should be separated when possible, and the cooking time will increase. Always check the thickest part with a food thermometer before serving.
Why did my Instant Pot sauce burn?
The sauce may have been too thick, the pot may not have been deglazed, or there may not have been enough thin liquid. Put broth or water in first, scrape the bottom clean, and layer thick sauce above the thin liquid.
How do I thicken an Instant Pot recipe?
After pressure cooking, use Sauté and simmer the liquid with the lid off. You can also mix cornstarch with cold water to make a slurry, then stir it into the hot liquid. Add flour or cornstarch after pressure cooking unless a tested recipe says otherwise.
Conclusion
To convert a slow cooker recipe to an Instant Pot, shorten the cooking time, keep enough thin liquid for pressure, and separate fast-cooking ingredients from slow-cooking ones. Begin with a conservative time, use the proper release method, and check the food before serving.
For your first attempt, write down the pressure time, release time, liquid amount, and texture. That small record makes the next conversion much easier.
Sources consulted
- USDA Food Safety and Inspection Service, Safe Minimum Internal Temperatures
- USDA Food Safety and Inspection Service, Beans and Food Safety
- Instant Pot, User Manuals and Product Support